Jerry Jenkins, 4 September, 016
Stacking, here short for focus stacking, means shooting a series of frames focused in different planes and then using stacking software to produce a single image by combining the sharpest parts of each frame. When it works, and it often does, it produces sharper images with greater depth of field (dof) than you can get with any single exposure. Here is Rosa blanda, smooth rose. Without stacking, the depth of field would only be a couple of millimeters. With stacking, the entire image, which is about 30 mm deep, is sharp.
And here is a more extreme example: the capsule and peristome (teeth around the mouth) of the moss Anacamptodon splachnoides. The capsule is about 3 mm long, and angled toward the camera to see into the mouth. It was shot at a magnification of 5X, meaning the image on the sensor was five times bigger than the object itself, or about 15 mm. At this magnification, my useful depth of field is about 0.05 mm, and I needed around 60 frames; even so, the stack was too shallow and didn’t extend to the bottom of the capsule. Hence the gluey mess at the bottom.
Briefly, the logic of stacking is that as you increase the magnification (M) the depth-of-field goes down as 1/M + 1/M². Using a full-frame sensor and shooting at f/8 where my lenses are really sharp, at a magnification of 1x I have a useful depth of field of about 0.5 mm. At a magnification of 5 x I have a useful depth of field of 0.06 mm. Since most things I want to shoot are thicker than this, any image I shoot of them is mostly out of focus.
I can, of course, stop down to increase my depth-of-field. But the results wouldn’t be very good. First of all, diffraction starts to degrade the whole image, in-focus and out-of-focus parts, somewhere around f/11, so I really can’t stop down very much. And second, even if I held my nose and stopped to f/22, I would only have 2 mm of depth of field at 1x, or about 0.2 mm at 2x. And that really isn’t very much.
For example: this picture of a mountain maple flower was shot at about 2x magnification. The stamens and petals stick up, and I need at least 5 mm of depth. With stacking, it is sharp from top to bottom. Without stacking, it would be unrecognizable.
A previous article, Stacking in the Field, explains this in more detail.
Stacking in the studio is generally similar to stacking in the field: you pose the subject, adjust the lighting, shoot a series of frames focused at different depths, and process them with software.
The main differences are that you bring the specimen to the camera rather than the camera to the specimen. this means, on the plus side, that you don’t have to contend with wind or direct sun, and you have more light, and you have more control over it. Hence that you can work more efficiently, and more easily at high magnifications, than in the field.
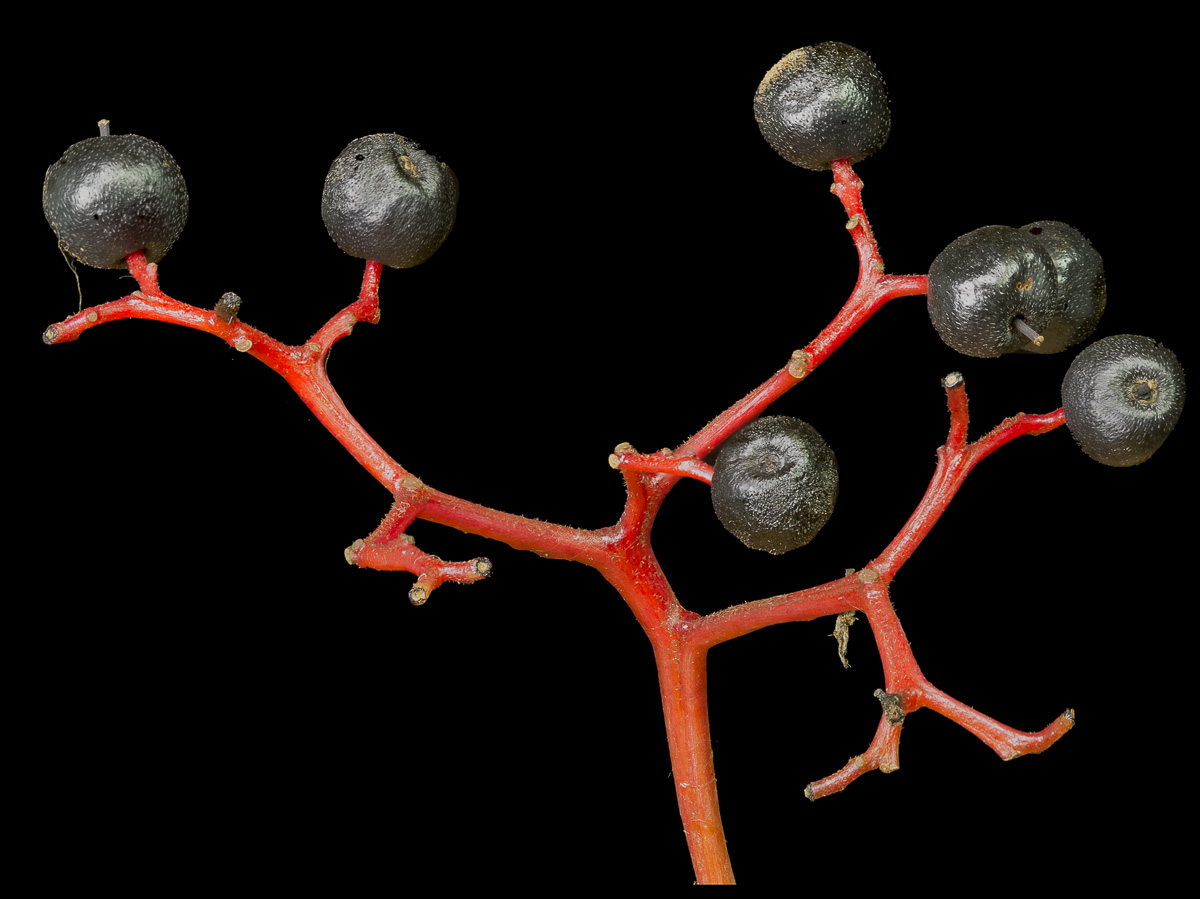
There are, however, minuses as well. You have to collect and transport your specimens and keep them fresh; you have to create a background for them; and you have to keep them from wilting or curling while you are shooting. You gain, on the one hand, the ability to isolate your subjects; you lose, on the other, their natural arrangement and ecological context. You can shoot pictures like this one of Polytrichum juniperinum, which are detailed and clear.

It, by the way, hates dryness, and you have to work fast to shoot before it closes up.
But, without going outside, you can’t take pictures like this, also of juniperinum and also stacked, which are complex and informative. Hence I work both inside, for efficiency and detail, and outside, for challenge and context.
My Studio
I am set up to shoot specimens from about 2 mm up to 40 cm. I shoot horizontally, with led panel lights in softboxes and diffuse window light when I have it, against a background of black cloth.
The diagrams show the arrangement. The workbench is 46” x 26”, with overhanging edges that I attach clamps and lights to. A tripod plate and ball head mount directly to the bench. Lights either clamp to the bench or to an overhead frame. A homemade specimen carrier, cobbled together from whatever I had around, slides on the bench. There is a large window, with, a white diffuser over it. A collapsible black reflector hangs about 2 meters from the camera, in a place where it is shaded from the window light.
All this is the result of a couple of years of experiment. I have tried white backgrounds, including back-lit ones, a la Niall Benvie, but get better contrast and color with black. I shot vertically, using copy stands or tripods, for about a year, but found it the set-ups clumsy, and that it was harder to hold specimens and get the backgrounds far enough away. I shot for about a year with natural light and reflectors, but had daily problems with color balance and shadows and never had enough light to shoot at high magnification.
So I developed this arrangement, which has proved efficient and flexible. I need to modify it to shoot larger specimens, and, sooner or later, build a tank to shoot things in water. But, in the mean time, over 5,000 images down the road, it has been a workhorse.
Equipment
I use much the same equipment I use in the field, for the same reasons. The main additions are the LED panels and softboxes, the Stackshot automated focusing rack, and the Canon MP-E 65, an ultramacro lens.
The current equipment list is shown the diagram. Here are some details.
The Stackshot controller, from Cognisys, uses a motorized focusing rack and a small control box to advance the camera toward the specimen and trigger the shutter. I use it for magnifications of 1:1 and above. Mine has been used hundreds of thousands of exposures, and has been highly reliable. There have been some cable problems, but everything that has a cable has cable problems. Their current cables are much better, and they are wonderfully quick and helpful when you have problems or need things.
I have LED panels from about 5” to 12”, from various manufacturers, some battery operated, some with power cords and transformers. On the whole I prefer battery-operated ones to corded ones because there is less clutter, but it is a trade off between annoyances. I bought cheap generic-brand panels a couple of years back thinking that I would replace them with better ones when they failed, but they haven’t failed.
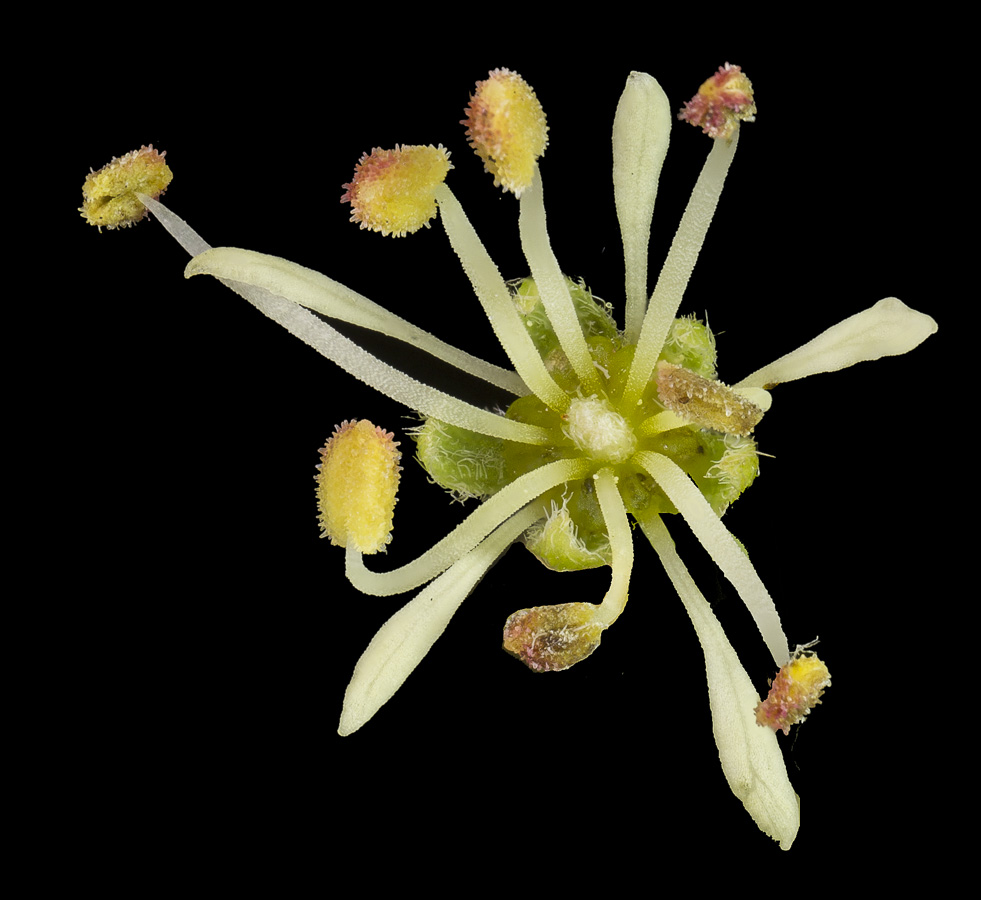
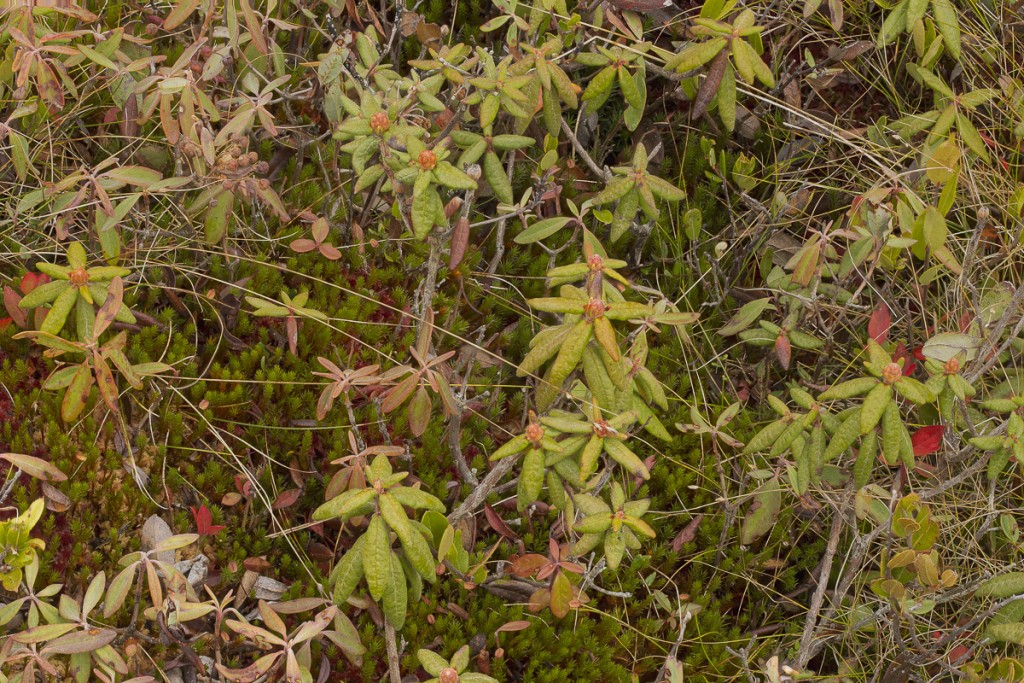
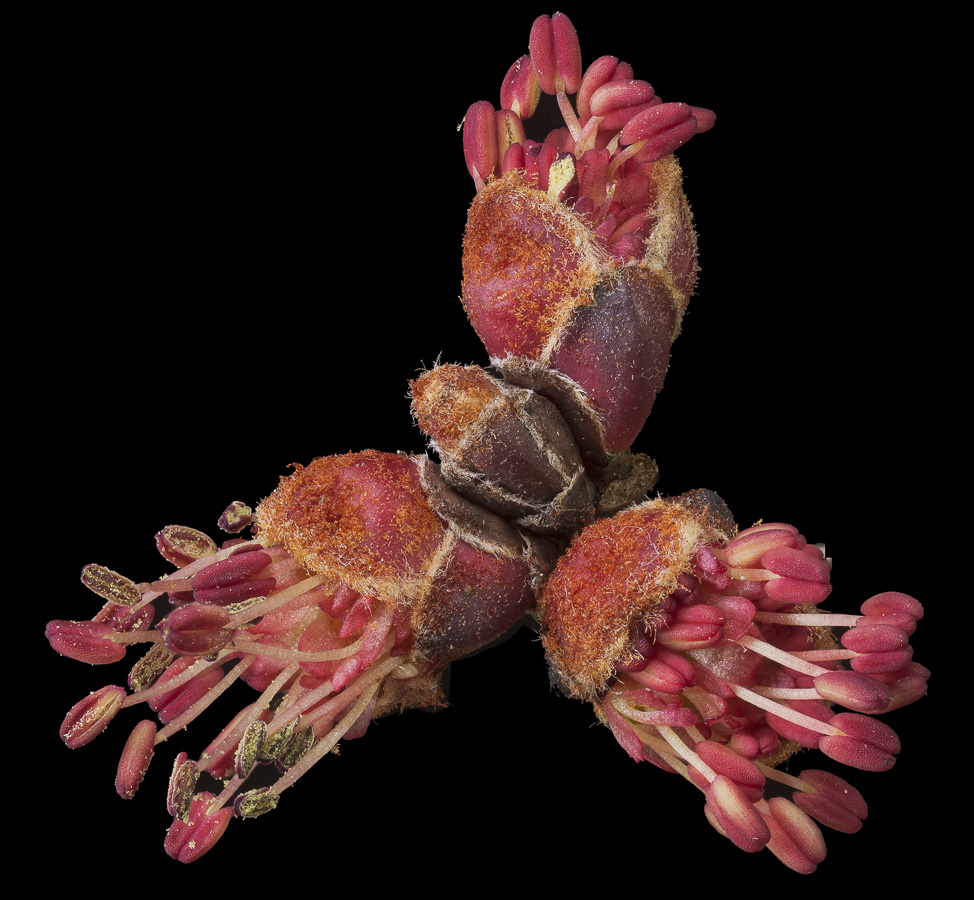
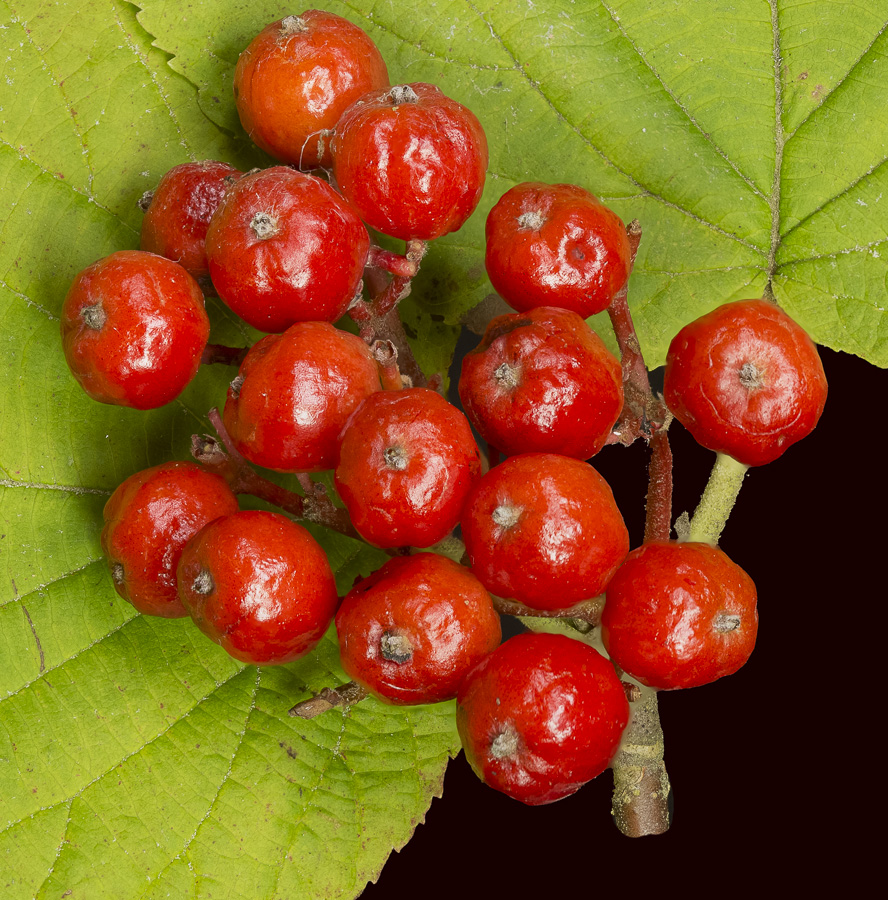
As shown in the diagram, I currently use four led panels, one large and three small. They are on pivots or goosenecks, and can be positioned and angled as needed. The front and side lights stay on all the time; the backlight is for highlights or translucent subjects. With them, I can get multidirectional lighting and control the amount of shadow. This is really important for plants, like these red maple flowers, which have things sticking out in all directions.
Many people use strobes, and use them well. I hate and fear them, and so don’t.
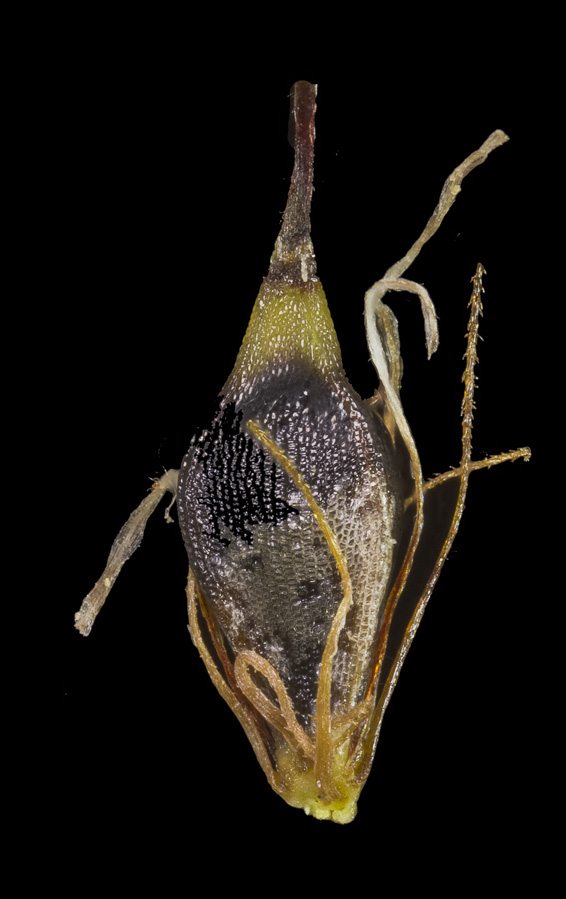
The macro world is very contrasty, and if you don’t soften the lighting your pictures will look like there were shot in a welding shop. Soft light means wide light—it is not so much what you put in fornt of the light source but how much you spread it out that matters. To do this you need either translucent, back-lit panels or softboxes. I use Chimera softboxes. They are pricey, well made, and fit small LED panels. Also, like the Really Right Stuff ballheads and clamps I use, they are American made. If I had found cheaper ones that fit my panels I would probably have used them, but I didn’t. They are helpful at all magnifications, but especially for tiny, reflective things like this seed (achene) of the small sedge Eleocharis quineflora, which would look awful with direct light.
My working camera is a Canon 5D Mark III, with either the Canon 100 mm macro (for large specimens) or the Canon 180 mm (longer working distance and really sharp) for magnifications up to 1x. For higher magnifications I use the Canon MP-E 65 ultra macro lens. It is a specialized lens that zooms from 1 x to 5 x. It has a short working distance, focuses by moving the camera, needs a lot of light, and takes great pictures. It is the only off-the-shelf solution in this range. The alternatives to the MP-E are all custom rigs—microscope lenses on bellows, reversed large-format enlarger lenses, that sort of thing.
Here are three pictures of silky dogwood, Cornus amomum, that show different working ranges. The first, showing leaves and fruits, needed a magnification of 0.2 and was perfect for the 100mm macro.

The second, showing a fruit cluster, needed a magnification of 0.5. Normally I would shoot this with the 180mm for maximum sharpness, but if I already had the 100mm on I probably wouldn’t go to the trouble of changing.
And, finally, this one of a single 5mm fruit needed a magnification of 5 and so was shot with the MP-E 65. The white streaks, which are curious, flattened, two-branched hairs, appear clearly at this magnification. I had never noticed them before. Macro photography is full of gifts like this.
My black background is a 48” Fotodiox reflector, but it could be almost anything. The key is getting it far enough away and keeping direct light off it. The light from the soft boxes falls off rapidly with distance. At 5x, a big piece of white paper would probably be dark enough, provided it was a meter or two away and not directly light.
My specimen holder is just some pieces put together, but has worked pretty well for my work, or at least not badly enough to make me build a new one. The key elements are tweezers wrapped with a rubber band and dissecting pins to hold things; a block with a lot of holes to allow positioning the tweezers different ways; a rack for vertical adjustments; and a smooth base that allows it slide around horizontally. The ball head is handy; the vacuum grip was used to couple the base to the ballhead, but if I had not had it lying around I would have done it some other way.
A dissecting microscope is essential with small specimens, both to pick the specimens you want to shoot and position them on the pins and tweezers. With mosses and some other tiny things, a compound microscope is necessary for identification. Often we think we know what things are without a microscope. But, unfortunately also often, when we check they turn out to be something else. So we check a lot.
I use several microscopes. Here are two favorites, both classics, the Wild M5 and the Zeiss Standard. I met them first as a teenager in the 1960s, and have loved them ever since.
Stacking Protocol
My stacking routine is straight-forward. I position the specimen and the lights, set the camera to live view, and adjust the lighting till I have good shadow detail and not too much glare. I have a preset that sets the camera to ISO 100, f/8, spot metering, and aperture priority. I put a white-balance card in front of the specimen, shoot it, and set a custom white balance. I then test the exposure and set the exposure compensation. I am usually between 1/25 sec and 1 sec depending on the size of the specimen, and may need anywhere from a half stop over to two stops under to get a good histogram. I like the histogram high, with good shadow detail, but am very careful to avoid overexposing reflections and white petals.
I then shoot the stack. For magnifications up to about 1:1 I leave the camera fixed and change the focus by nudging the focus ring and triggering the camera with the Stackshot controller. For higher magnifications, where the increment is small and I am using the MP-E (which has no focus ring!), the controller is in charge. I set the starting and ending positions, and the rail and controller do the rest. At an average of 25 frames per image, I have shot somewhere between 100,000 and 200,000 frames with the Stackshot rail, and it is still good as new.
Both refocusing and using the rail to move the camera produce excellent results. Refocusing avoids the parallax problems that arise when you move the camera toward a large object. Using the rail produces the tiny intervals that you need at high magnification. Rik Littlefield, the inventor of Zerene Stacker, has excellent tutorials on the trade-offs involved, and many other aspects of stacking, at http://www.zerenesystems.com/cms/stacker/docs/tutorials/tutorialsindex.
The real value of an automated set-up is that it is productive. I may come back from a field trip with 1o plants I need to shoot while they are still fresh. I make 5-10 images per plant. I want to work efficiently, but still take the best pictures I can. With the automated set up, I can shoot my ten species in one or two days, and then go out and get more. Without automation, I might work at half the pace or less.
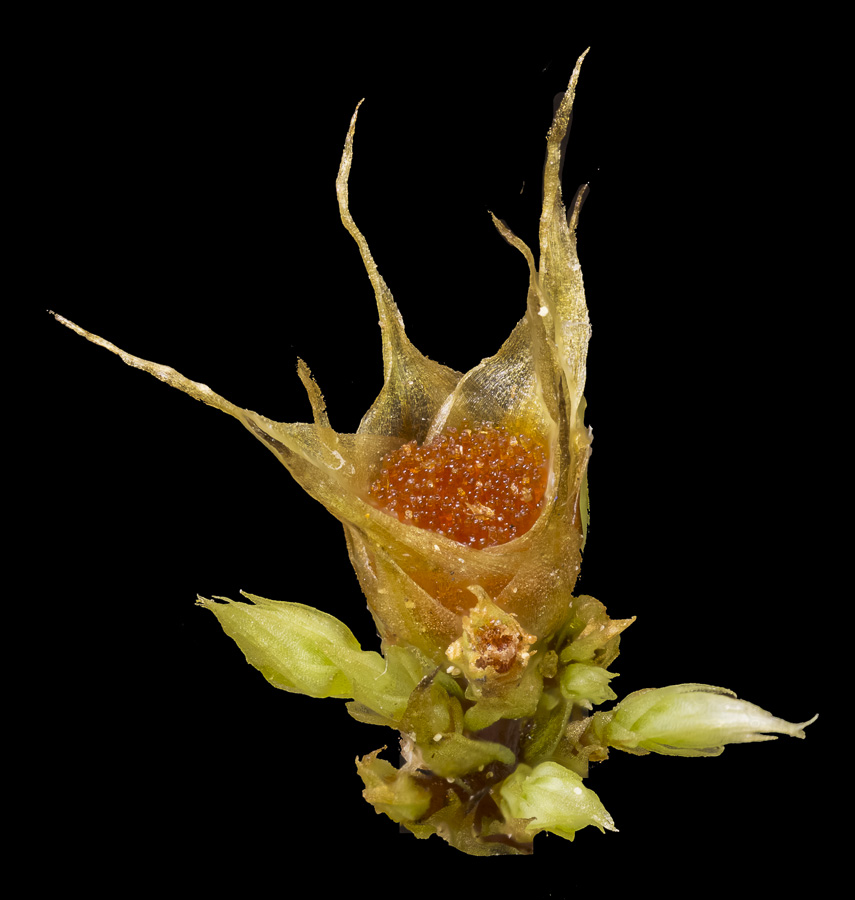
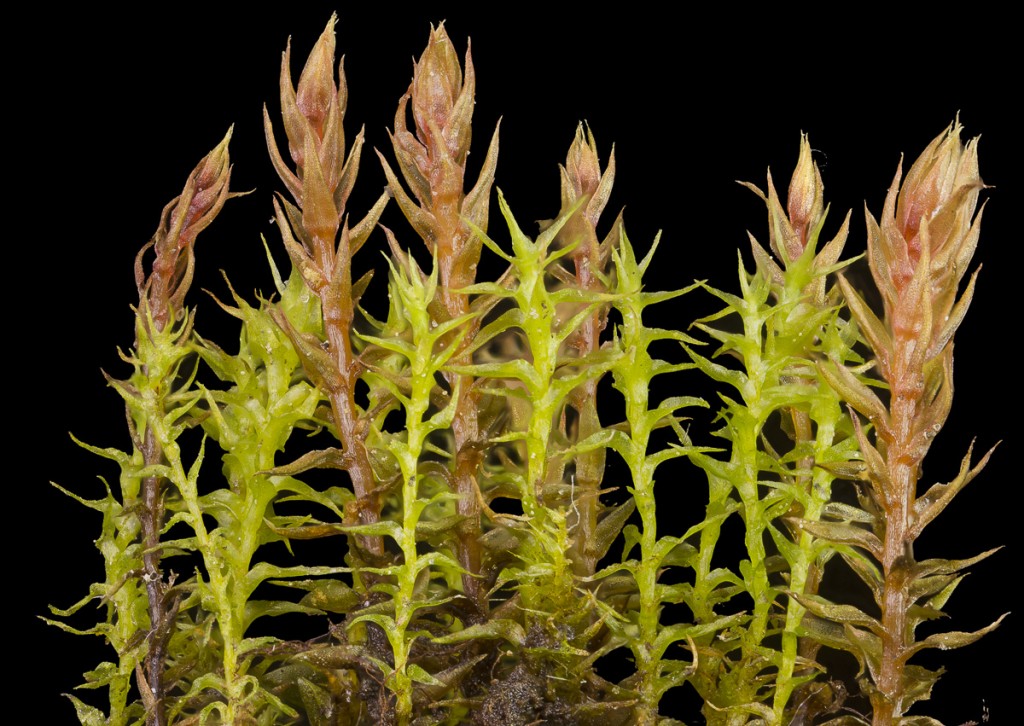
The automation is unimportant, and actually, for me, counterproductive, at magnifications under 1x. There refocusing is both faster and, I think, yields fewer artifacts. It is most important when you are shooting small things that need large stacks and small amounts of camera movement. There, as in this picture of the perigonial leaves and red antheridia of Philonotis marchica, it is essential.
Tethering and Processing
A few words about a large subject. Everyone has their own approach to processing stacks. I transfer my pictures to the computer on a memory card and import them into Lightroom; output them as tiffs, with each stack in its own directory; batch process them with Zerene Stacker, which then writes them to a watched directory where they are reimported automatically into Lightroom; export them to Photoshop where I remove stacking artifacts, pins, and tweezer tips, and convert the background to pure black; and return to Lightroom for sharpening and correcting color, brightness, and contrast.
As with the stacking itself, my procedures are geared to efficiency and production and continue to evolve. I used to tether the camera to the computer. That caused more trouble than it was worth, and I abandoned it. I don’t, as a rule, preprocess before I stack, and usually stack in batch mode and edit in Lightroom and Photoshop rather than in Zerene. The stacking masters—see Rik Littlefield again, and the contributors to the forums at photomacrography.net—do a lot of custom editing in Zerene. If I was a good as they are and running less of a production shop, I would too. Instead, I try to take pictures that don’t need that much editing, and save my detailed editing for the best images and do it at the end of the processing cycle.
And would argue that, since producing large libraries of stacked botanical imagery is still unexplored territory, the results justify the compromises. Here are a few, at a series of magnifications, so you can judge for yourself.
At low magnification, the opening buds and flowers of beech, Fagus sylvatica, and the immature fruits of hobble bush, Viburnum lantanoides.
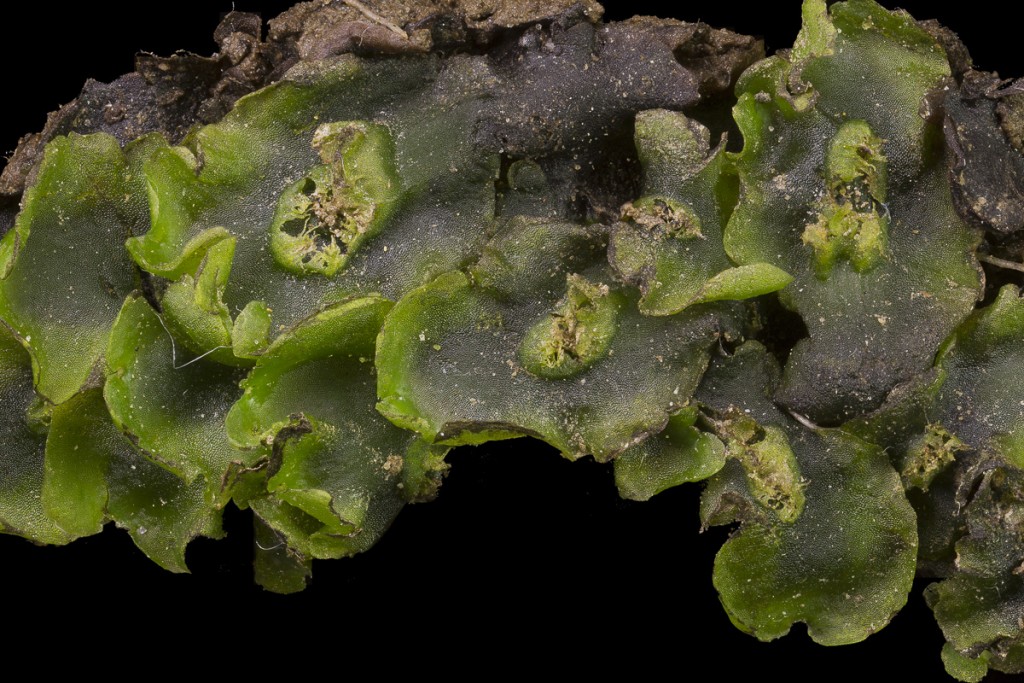
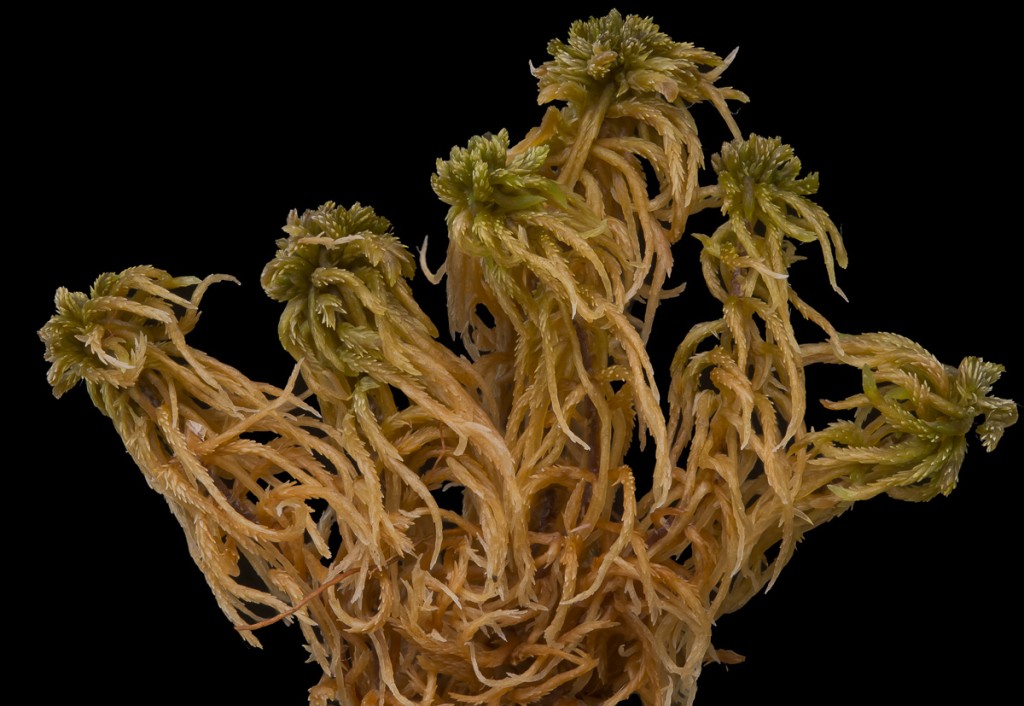
At medium magnification, the liverwort Moerkia hibernica and the moss Sphagnum fuscum.
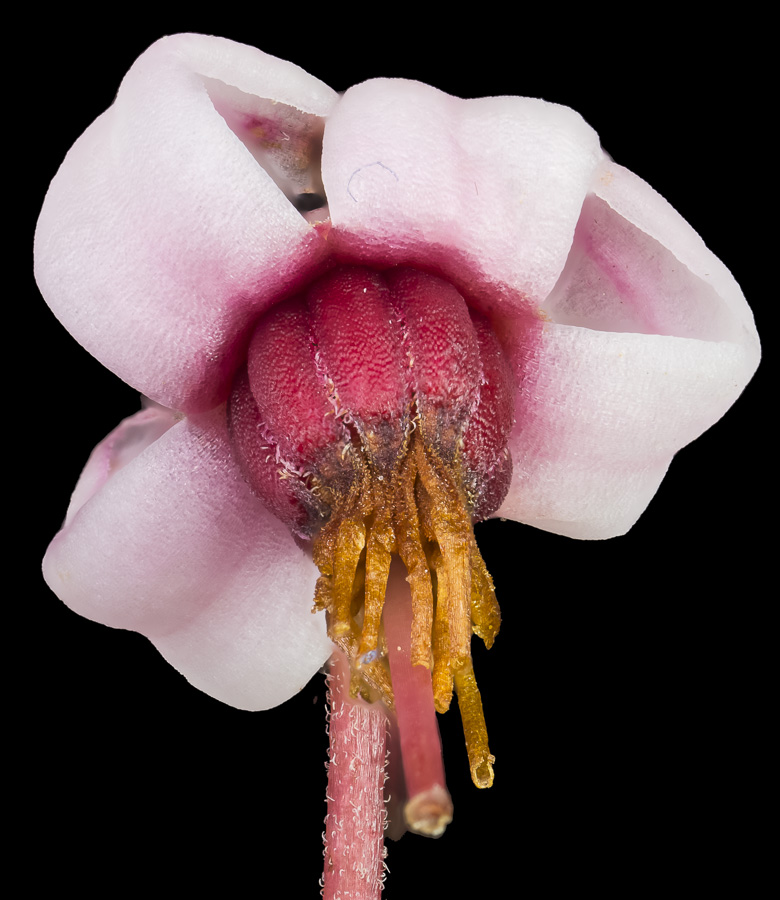
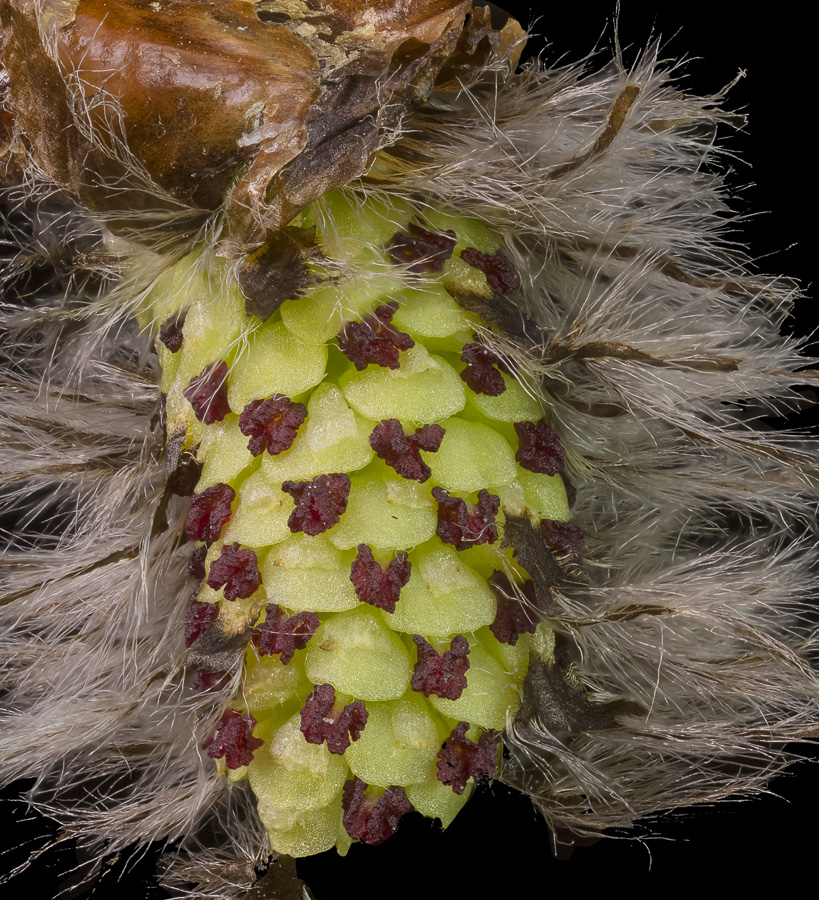
At magnifications approaching 1x, the flowers of the dwarf cranberry, Vaccinium oxycoccus, and the female catkin of the quaking aspen, Populus tremuloides.
Entering the ultramacro range at around 2x, the moss Bryum pallens, which was new to me.
And at 5x, the limits of what I can shoot, a perigynium (sack surrounding ovary) of the sedge Carex aurea.