Jerry Jenkins, September, 2016
What is it?
Focus stacking is a digital technique for increasing depth-of-field, the region of the image that is in focus. In close-up photography, there is one basic rule about depth-of-field: there is never enough of it.
Here is a camera focused on a snake. The points on the dark line will be the sharpest, those closer or farther away less sharp. The depth-of-field, dof, is the width of a band, shown in dark green, within which the focus is acceptably sharp according to some criterion. Its width depends on the lens, the sensor, the camera settings, how much the image will be enlarged, and how fussy the photographer is.
Focus stacking is done by taking a series of pictures focused at different distances, either by moving the camera or by refocusing. The first diagram shows the camera being moved forward on a focusing rack. The second shows the camera being refocused.
Each photo is essentially an optical slice of the snake. The collection of these slices, from the nearest part of the snake to the farthest, is a stack. Stacking consists of combining the photos in the stack into a single image. The software starts with the first photo in the stack and compares it to the second. If any parts of the second are sharper than those in the first, it throws the blurry parts of the first away and replaces them with the better parts of the second. It then repeats this for every image in the stack, effectively creating a composite image out of the best parts from each slice.
Why stack?
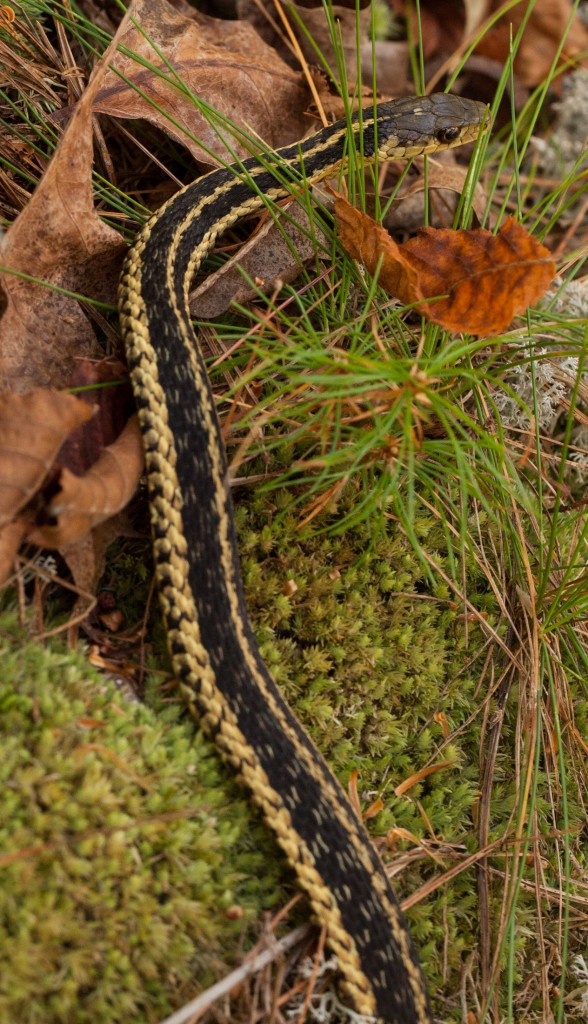
The quick answer is that when you are photographing anything small, and by small I mean less than meter or two, depth of field is a serious limitation. Here is a photo of a snake, shot with a macro lens at f/9. The head is nice and sharp, everything else is fuzzy.
This is not an accident. The nominal dof depends on the aperture and the magnification. If we put a 35 centimeter snake on a 3.5 cm, full-frame sensor, the magnification is 0.1x. At f/8, the nominal dof—which remember is an area in which the image is more-or-less sharp, not truly sharp—is only about 3 cm.
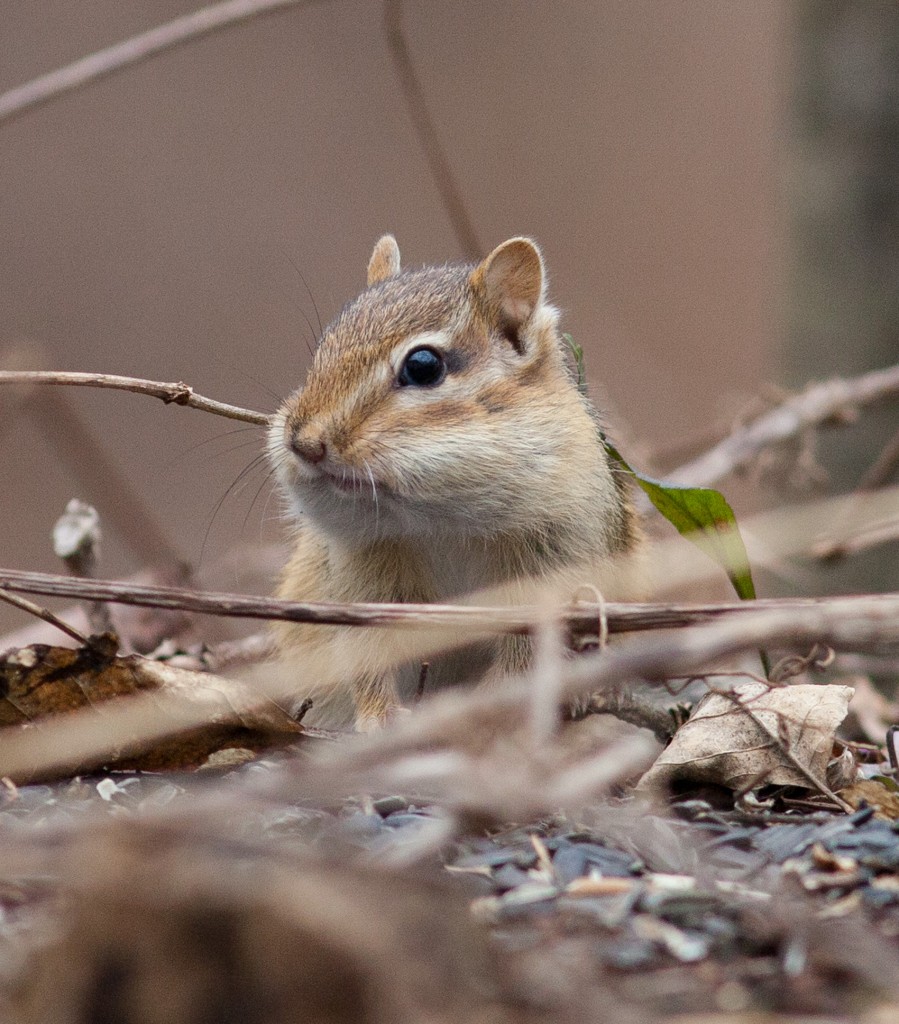
This is acceptable if all we are interested in the head, and in fact a significant amount of wildlife photography consists of out-of-focus animals with sharp heads. Telephoto lenses produce this naturally. Here, for example, is a White Creek chipmunk we called Bottomless. It is shot at f/5.6 with a 300 mm lens, fast exposure and low dof.
The image is cropped way down, the background is unimportant. It is decent picture of a chipmunk, but a poor picture of the woodbine stems the chipmunk is sitting among.
Aperture Is Not Really the Answer
You can, of course, increase dof by increasing aperture. The formula for depth of field is linear in the aperture, so going from f/8 to f/16 gets you to 6 cm of dof, and going to f/32 gets you to 12 cm.
This is useful, but hardly a cure-all. First of all, 12 cm dof of field still isn’t very much. If you are shooting a 36 cm rabbit facing you, it is only about a third of the rabbit. Second, it forces you to use longer exposures, higher isos, or flash, all of which have drawbacks.
And third, and most important for the work I am doing, because it squinches all the light from the image down through a tiny aperture it degrades the image quality. The lenses I use are typically sharpest somewhere between f/11 and f/4.5, and often in the low end of that range. The are acceptable, but never their best at f/16. F/32 we don’t talk about.
Another way of saying this is that there is a reason lens makers use all that glass. A lensless pinhole camera has enormous dof, but a very poor image. To get a good image you need a wide bundle of rays, and wide bundles of rays need big complicated lenses.
This last is worth stressing. Squinching light through a small hole causes diffraction. Diffraction is a quantum effect—if you limit where a photon has been you lose control of where it’s going to go. There is no technical fix. It is limiting, especially in close-up photography, at apertures that are routinely used in landscape photography. And it degrades everything in the image.
So the answer to the question “Why not just stop down to say f/32 and increase the depth by four times?” is that while stopping down adds some depth in the out-of-focus parts, diffraction degrades in the in-focus parts. The result is an image that has more depth but is not really sharp anywhere.
Stacking Is
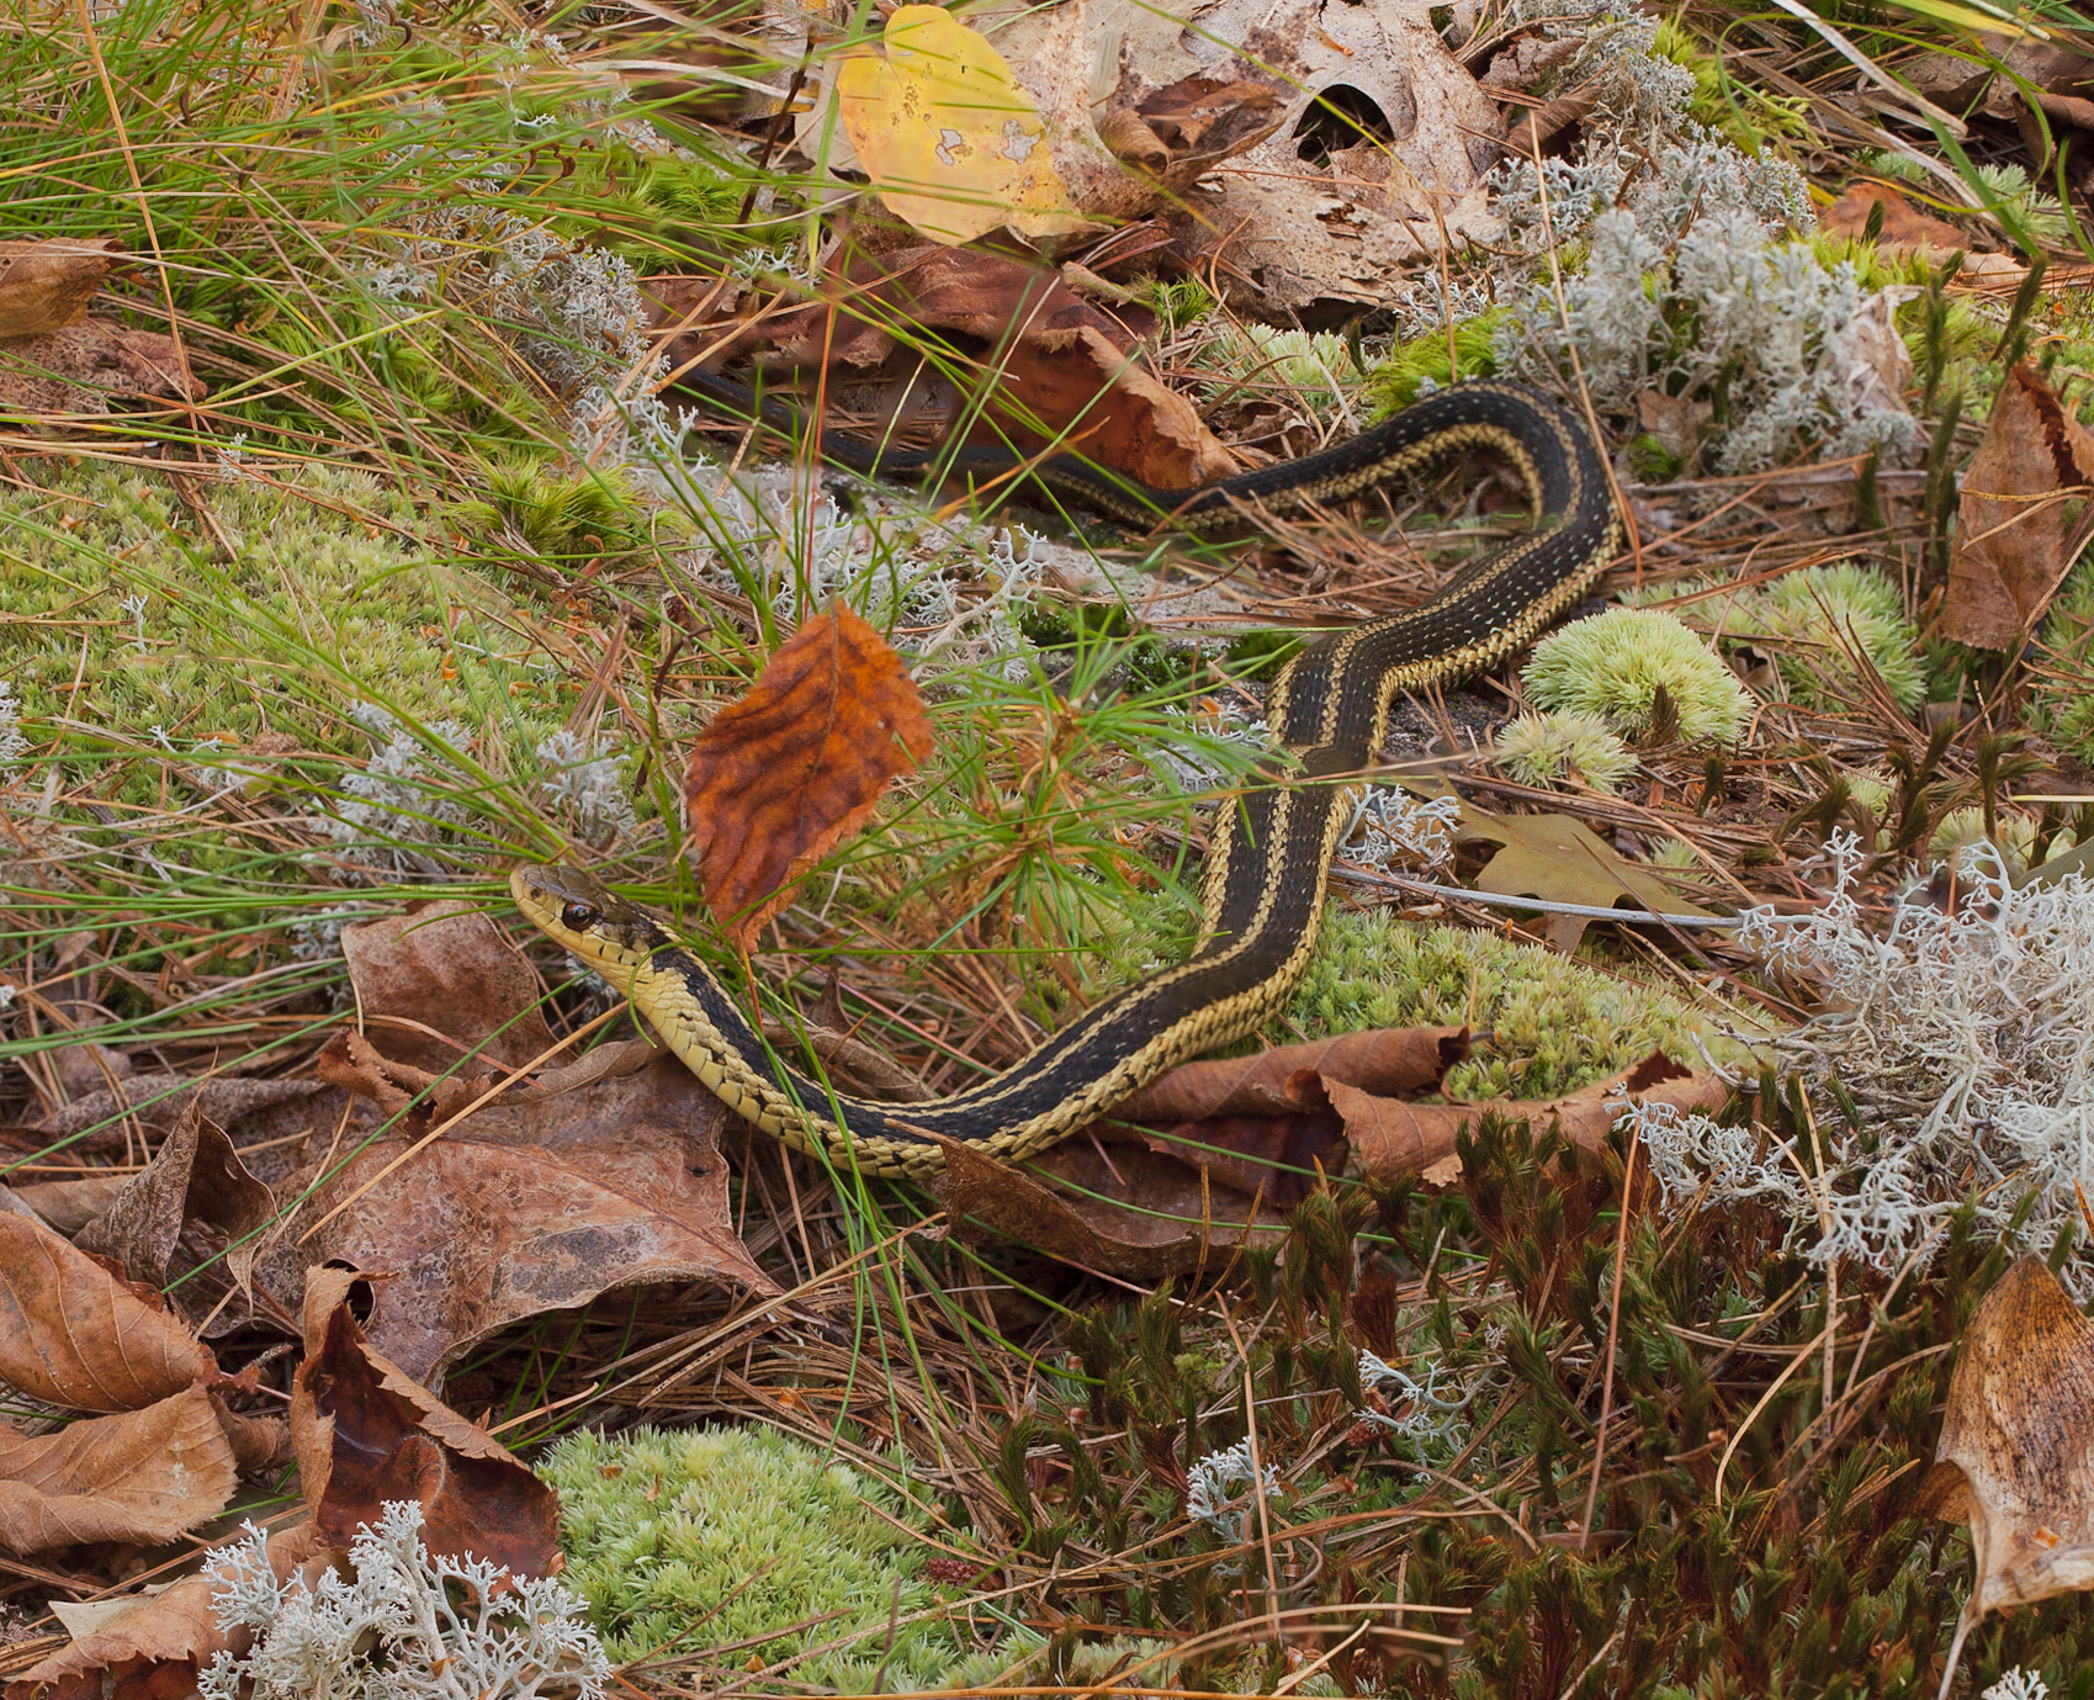
The garter snake shown above sat quietly while I shot about 15 photos, nudging the focus so it progressed from head to tail. I stacked the images with Zerene Stacker, edited in Lightroom, and had a stacked snake.
The snake, pine needles, leaves, lichens, and three species of moss are all in pretty good focus. I didn’t extend the stack far enough and so the tail is not in focus. But if you need ecological context, and in the Atlas Project we do, stacking is essential.
When do you need stacking?
The quick answer is when you want are within a meter or two of your subject, and you need the whole image in focus. Outside these limits—and much fine nature photography has been done outside them—you don’t need to stack.
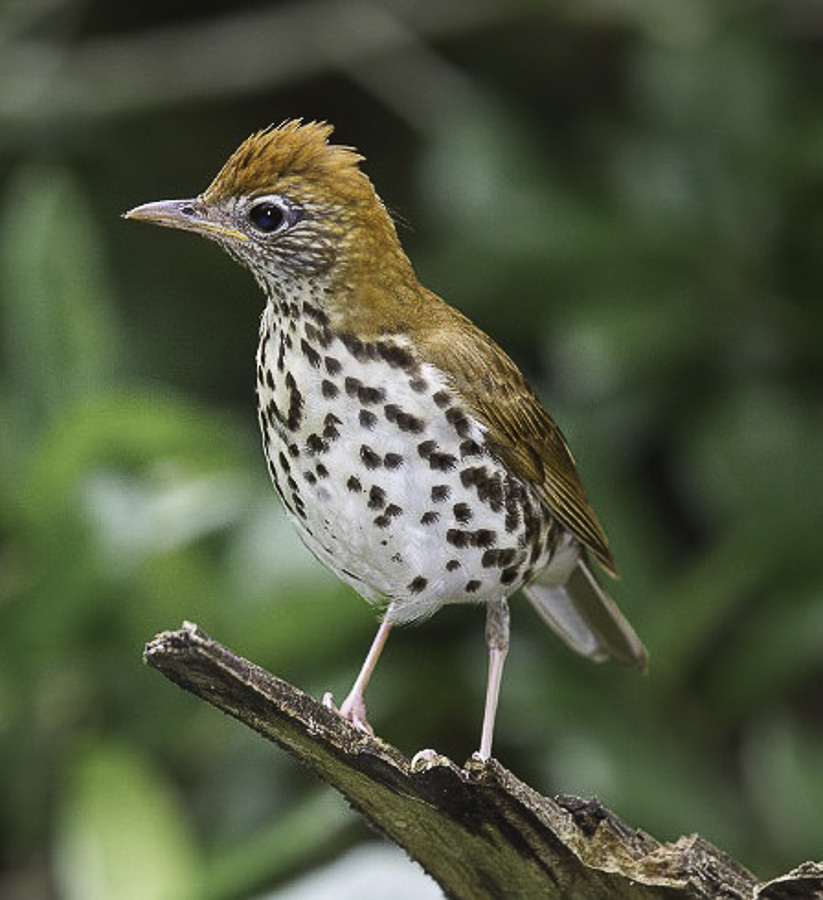
Here are a couple of examples of what you can do without stacking. From Atlas collaborator Larry Master, http://masterimages.org/, a wood thrush, isolated from the background with a telephoto.
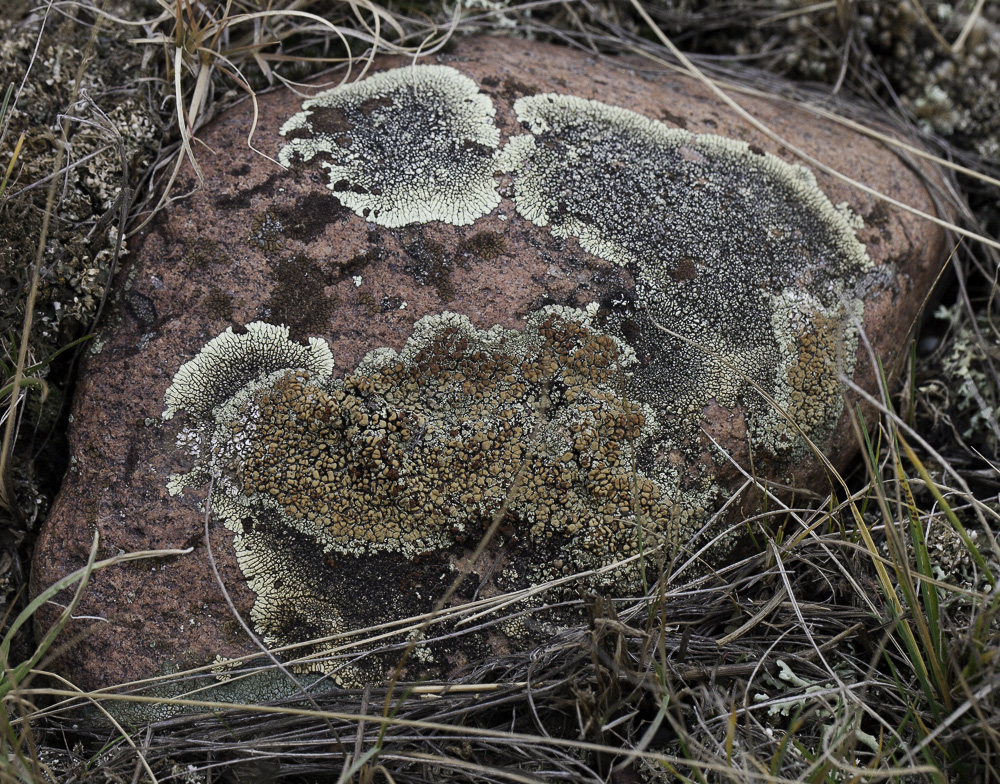
Some lichens from the Canadian prairies, composed so the rock surface is perpendicular to the camera, and shot at f/11 with a 100 mm macro lens. The lichens are largely in focus, though they blur where the rock rolls away from you.
A hemlock swamp in Connecticut, shot with a zoom lens set at 58 mm. It is a composite of three photos shot at different exposures to capture the dynamic range. The width of the field, at closest focus, is about 5 meters, and dof is not a problem.
But, though you clearly can make top-notch photographs of trees and bears and closeups of straight snakes without stacking, there are a lot of things that are too small, too deep, or too intimately connected to their backgrounds to shoot this way.
These include many of the plants on this web site, and many of our habitat photos showing plants up close. For these kinds of subjects, stacking is essential. Here are some examples of pictures that could not be shot without stacking.
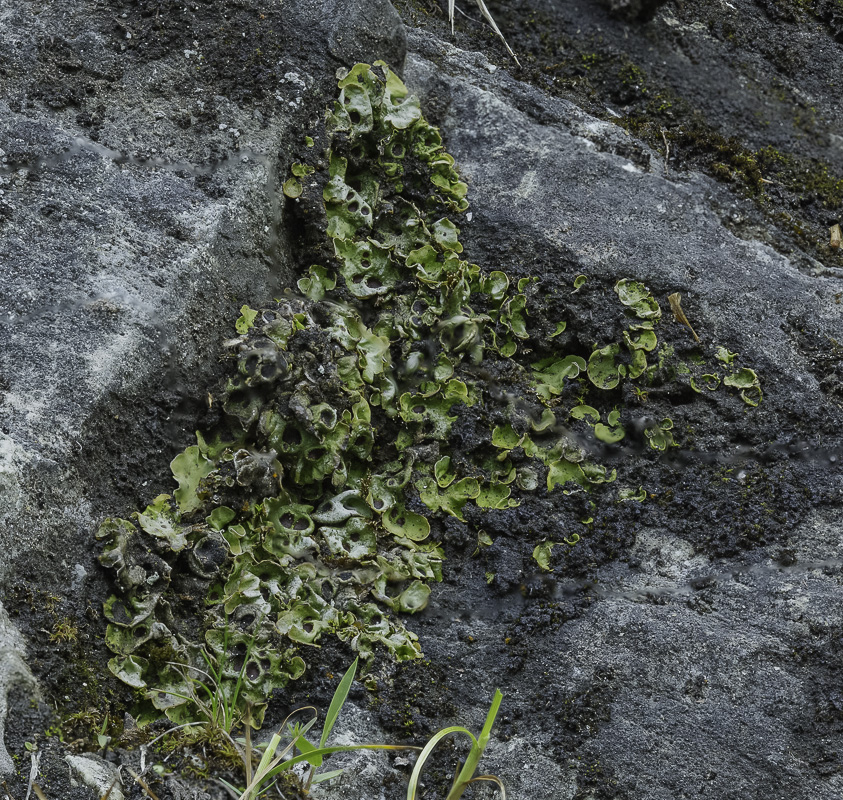
Solorina saccata, an uncommon lichen, from a cliff in north Vermont. The magnification is about 0.2 x, and so the useful dof is only a couple of centimeters. The cliffs slopes away from the camera and there was no way to get the camera perpendicular to it.
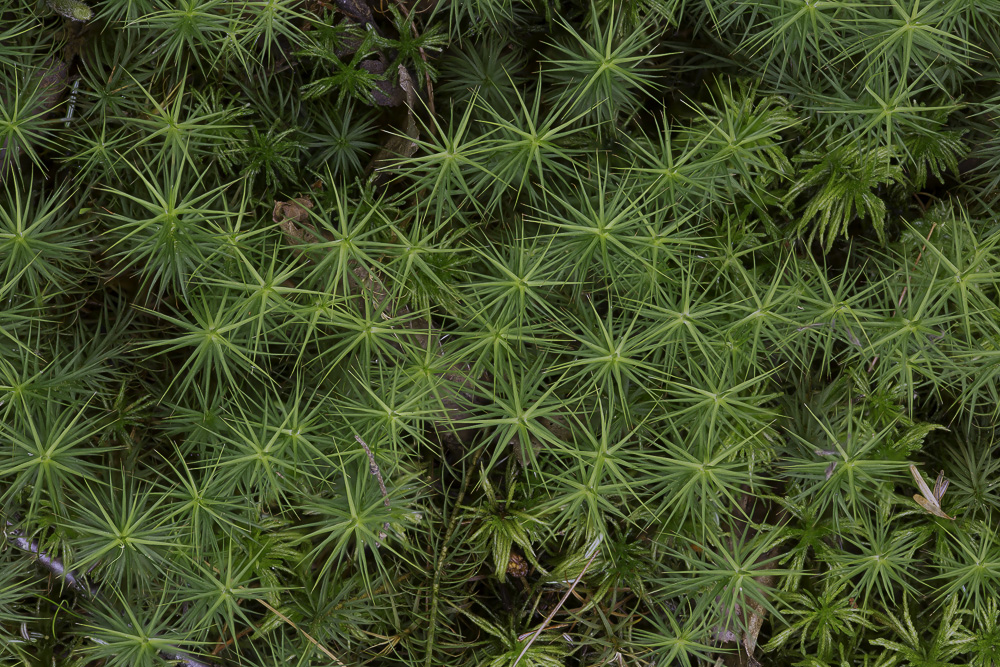
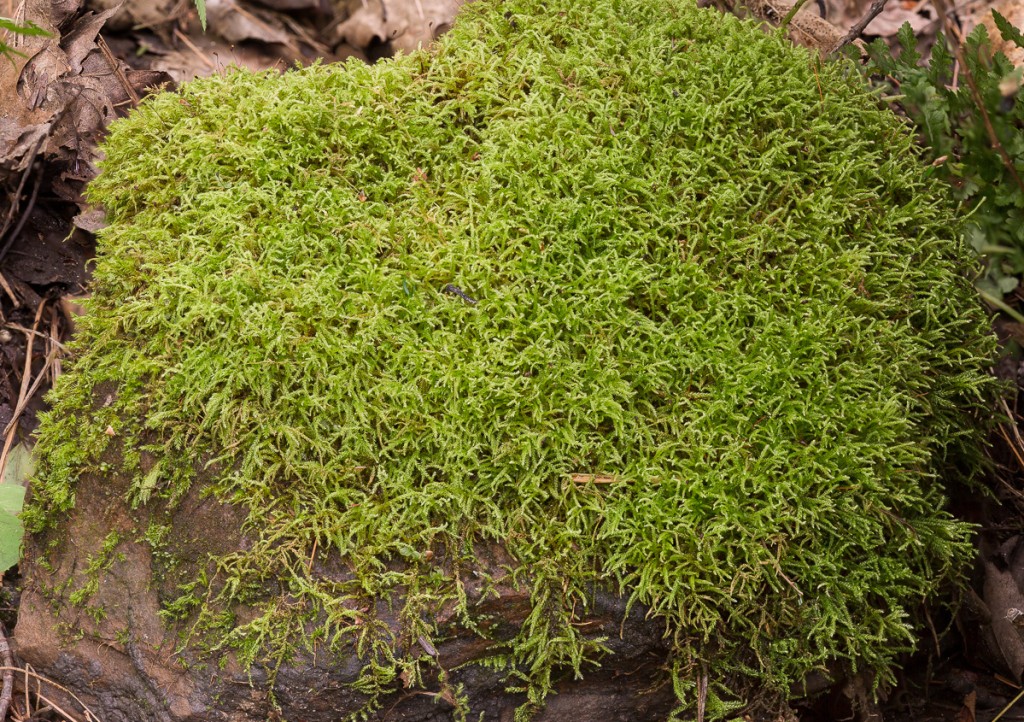
Polytrichum pallidisetum, a common woodland moss, from a swamp in Massachusetts. These plants are 5-10 cm tall. The depth of field is at most a couple of centimeters, and stacking is essential.
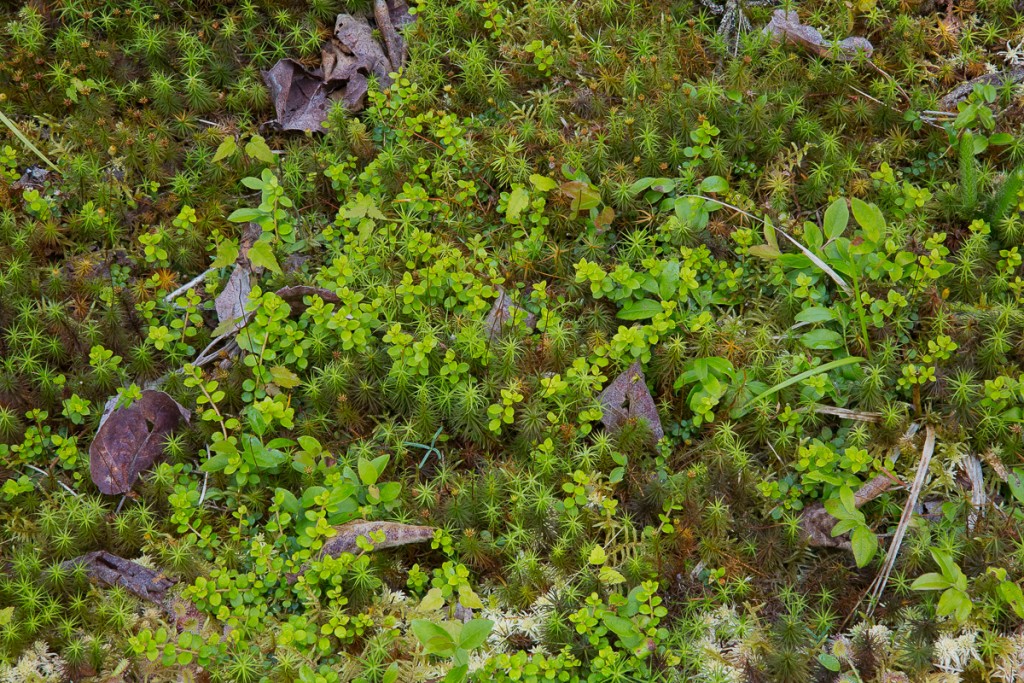
A boreal forest floor in the Adirondacks, at a magnification of about 0.07x. Shooting at f/8 at this magnification I have about 5 cm dof. This is a borderline situation. By stopping down to f/16 and composing carefully, I could probably get an acceptable photo without stacking. But stacking allows me to use the lens where it is sharpest and to shot the view I want to shoot rather than the one I have to.
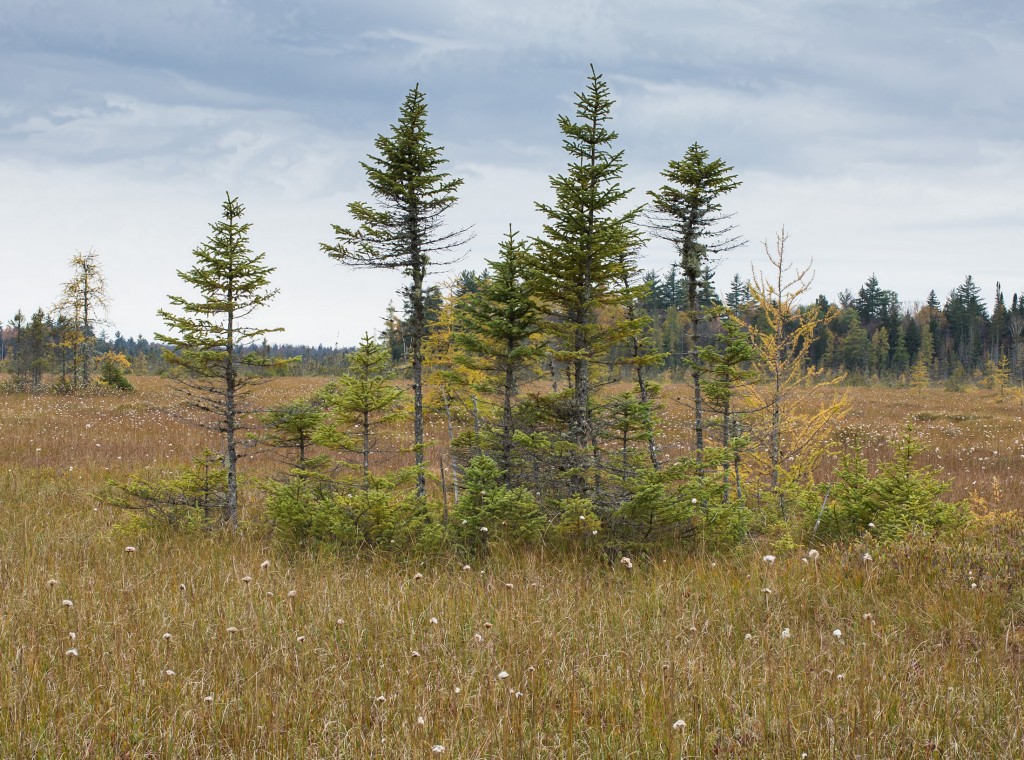
Finally, if you want a landscape shot to be in focus from a a meter or so from the camera to the horizon, and do not happen to be carrying a view camera with a tilting back, stacking is the natural way to go. This is especially true if you want to keep the lens open to resolve fine detail. Here is a meadow of Eriophorum virginicum and Carex oligosperma, two common peatland sedges, in Spring Pond Bog in the western Adirondacks. It was shot as a stack of about 5 images at f/8.
Stacking and Magnification
To sumarize, I stack whenever I am within a meter of what I am shooting, and especially when I am taking what I call close-focus landscapes—pictures in which you want everything in the field to be in focus. I also stack landscape photos when part of the landscape is near the camera.
This may seem excessive: there are a lot of pretty sharp pictures taken from a meter away. But my experiments, and some numbers, seem to bear this out. The argument goes like this.
Depth-of-field depends inversely on the magnification. When you are photographing a mountain, or the earth from space, the image is a lot smaller than the object, the magnification is small, and depth of field is no problem.
As you get closer to objects, the magnification increases. When you take a macro picture, filling the frame with, say, a flower only 5 mm wide, the image is larger than the object, the magnification is greater than 1, and the depth of field is tiny.
The diagrams illustrate how depth of field changes with magnification. At f/8 and a magnification of 0.01x, in the bottom diagram, the field of view is about three meters wide. This is about the size of a moose, The depth of field is about 2 meters, and, if the moose is not exceptioally fat, stacking is not usually necessary.
As the object gets closer, the magnification increases and the dof decreases. The dependence is roughly inverse square for magnifications <<1 and inverse for magnifications >1. Either way it matters. At f/8 and a magnification of 0.1x, typical of a lot of field photography of plants, the field of view is about 35 cm and the dof down to 3 cm. At a magnification of 1x, typical of normal macro work, the field of view equals the width of the sensor, in this case 3.5 cm, and the depth of field is under 1 mm. At 5x,on the boundary between macrophotography and microphotography and requiring special lenses, the field of view is about 7 mm wide, and the depth of field, for critical work, is under 0.1 mm.
Equipment For Stacking In Field
Field stacking requires good camera support, a sharp lens, and shades or diffusers to soften the light. Good pictures can be taken with all different kinds of equipment. I am taking pictures for publication and trying to push the limits of sharpness and depth. This has, in turn, pushed me toward relatively heavy and expensive equipment. My old legs, also in turn, are pushing back against this, and I may try other combinations as they become available.
Until that happens, my current working gear is a full-frame digital single-lens reflex, a prime macro lens, usually a zoom lens for context and landscape photos, a carbon-fiber tripod and ballhead, a collapsible neutral gray reflector for color balance, and one or more collapsible reflectors that convert from black for shade to silver for reflection to white for diffusion.
All of this is essential for good work. When combined with holsters, batteries, a notebook, a backpack or a belt with pouches, filters, gooseneck clamps to hold the reflectors, I need about 15 to 20 pounds of photo gear for a day in the field. As I said, when I can find a lighter way I will, but I have now made thousands of field photos with this gear, and it works well for me.
The illustration shows the gear I currently use. Certainly other combinations will work too. But there are reasons for my choices. For what it is worth, they are that:
I use a full frame camera because I often crop field photos a lot, and with a bigger sensor there are more pixels left when I am done. I shoot both through the viewfinder and with live-view, and so a single-lens reflex works well. If I had to choose one or the other I would stay with the live-view, combined with a hood so I could use it in bright light.
I use the Canon system because of their MPE-65 ultramacro lens, which is my standard studio lens.
My favorite field macro lens is the Canon 180mm macro. It is amazingly sharp, and allows me to shot a 1:1 image of an object 50 cm from the camera. The long working distance, compared, say, to a 100mm macro, means less lighting problems, less kneeling and stooping, and less adjusting the tripod. All are important, especially working on rocks and in swamps.
If I am shooting bigger subjects, I often switch to the Canon 100mm macro, also very sharp, and smaller and lighter. For even bigger subjects, or in situations like cliffs and shores where it is hard to move the tripod, I use a 24-105mm zoom. But the macros are sharper, especially up close, and sharpness is what stacking as about.
The tripod and ballhead are very important. They represent about a quarter of the weight I carry, and far more of my working time is spent adjusting them than adjusting the camera. And I work with medium-weight equipment, on cliffs, in waist-deep water, and everything in between. So they must be light, high adjustable, rock solid, and a pleasure to use. Really Right Stuff equipment more than meets these requirements.
Finally, natural light varies a lot in color and harshness, and so I need reflectors for shade and fill light. I also need to be careful about color balance correction. The Fotodiox collapsible reflectors with removable sleeves that change them from transparent to opaque have worked well for me.
Many nature photographers use flash to fill shadows and stop motion. Steve Sharnoff is a master at this. Have a look at his lichen photographs at http://www.sharnoffphotos.com/lichens/lichens_home_index.html and see what I mean.
I do not use flash fill, first because I don’t know how to, and second because it would be more to set up and carry. And while I would love to be able to freeze, say, a moving sedge, since I need to take ten or 20 pictures of it for a stack, flash is not that much help. To stack sedges, I shoot on windless days or not at all.
I do sometimes carry an LED panel on a gooseneck and a softbox to fill shadows, especially when shooting mosses in crevices or shaded vertical cliffs. This is very helpful when you need it, especially if you can give the bag with the panels, batteries, soft boxes, and clamps to someone else to carry.
How to Stack in the Field
The diagram shows my procedure:
Pick a subject, set the tripod up, shade it with a reflector if necessary.
Put the color correction card over the subject, shoot a picture of the gray side, look for any color cast. If there is, tell the camera to use that picture for a custom white balance. Shoot another picture and see if the balance is better. The light under green canopies is weird, especially in early summer, and sometimes the camera can balance to it and sometimes it can’t. When it can’t, you can use the picture of the card to set the balance when you process the images.
Set aperture priority and choose a speed and exposure. I typically start with iso 400 and f/8, and go to iso 1,00o or f/5.6 if the light is low. I always shoot full-resolution raw files, not jpegs. I usually use evaluative metering, and the Canon seems to default to that in live-view. But it doesn’t matter much because I review and adjust the exposure for every stack.
Focus on the nearest point in the subject. Block the viewfinder, or use live-view or lock the mirror up. (Light through the viewfinder throws exposure off.)
Shoot a picture using a trigger or (my preference) a 2-second time delay. If the exposure is longer than, say, 1/10 second, use live-view or lock the mirror up.
Check the histogram and correct the exposure by setting exposure compensation. Try to get a lot of the pixels in the right half of the histogram, but don’t blow the highlights out!
Nudge the focus ring, turning it counter-clockwise when seen from behind the camera, the smallest amount you can.
Shoot another picture and repeat. Stop when the the farthest object in the field is just starting to pass out of focus. For me, this is usually 10 to 20 frames.
Take the pictures to the computer, download, stack them (I use Zerene Stacker) and edit and catalog them. For details on this, see the article on Stacking in the Studio.
Beyond this, it is practice and experiment. You have to learn what subjects work, how to set up and shade and fill, how to deal with different colored light, how to expose, how many frames to shoot, whether to preprocess your images before stacking, what kind of postprocessing works best.
My practice, outlined above, is based I what I do most of: plants and plant associations, magnifications up to 1:1, natural light with at least medium contrast, windless conditions.
Your subjects and your practice, will likely be different from mine. You may end up using flash, or LED panels, or an illuminated white background like Niall Benvie, http://niallbenvie.com/meet-your-neighbours/. You may like to shoot tiny things and use a focusing rack rather than nudging the focusing ring. You may stack large-scale photos to get deep-focus landscapes. Or you may use a zoom lens or a wide angle. There are many different applications of stacking, and different photographic regimes for each application.
Boundaries and Limits
To summarize: When should you stack in the field? Whenever you need more sharpness and depth than you can get with a single exposure. This will depend on how many pixels for have available, and how much you are going to enlarge the image. For me, shooting full frame (which I pay for in weight!) and wanting images that look sharp enlarged to full-screen on a high resolution-display, this means that anything smaller than about a meter (thus, with a magnification of about 1:30 or higher) gets stacked.
When don’t you need to stack? With anything at small magnifications, and with anything where sharpness and depth are not important. When shooting the moon, or a mountain, or a whole tree, or a single bird in a tree.
When can’t you stack? When the subject is moving, which, for plants, means windy days are bad. When the contrast is high, and you need to shoot high-dynamic-range composites instead. (I will post an article on hdr later this year.) When you are looking into three-dimensional tangles, like a meadow or a marsh. The current stacking software is amazing, but it has limits. And when the light is flat and the contrast is low. Here, additional lighting may help, or you may want to give up and try some other time.

